Overview:
Setup your Xero integration options for each financial company here, and once that is done you can seamlessly sync your batch data between Workbench and Xero.
Screen Guide:
The Xero Integration screen is accessed from the main menu in Workbench under the Administration - Data Transfer folder, and gives you a visual overview of configuration for the selected Financial Company.
The configuration for the selected Financial Company is displayed and modified here, and also to initiate the import sync process with Xero. Data export to Xero is initiated for the respective batch types from Batch Control.
If the Xero integration is not setup, refer Getting Started.
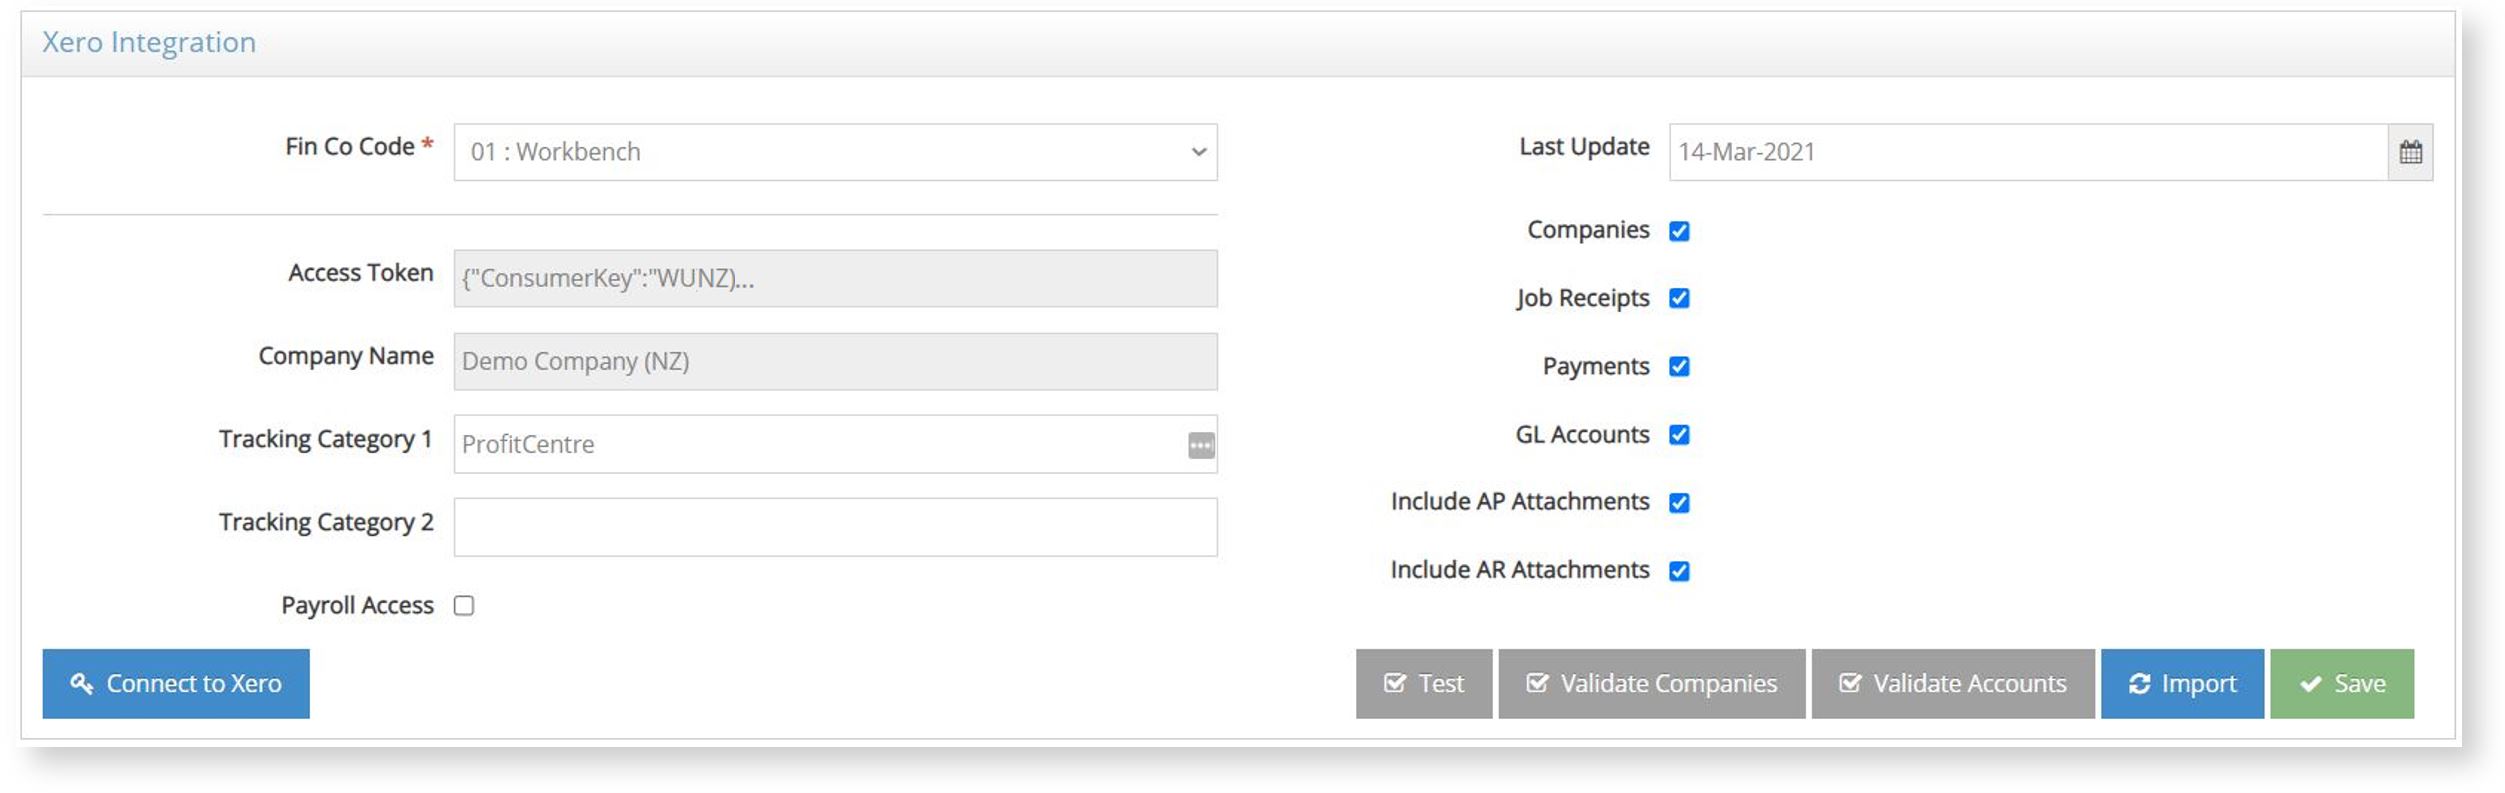
- Fin Co Code selects the Financial Company to view or edit its Xero configuration. All other details are within context of the selected financial company. Where multiple financial companies are used refer Multiple Financial Companies.
- Last Update displays the date of the last sync.
- Access is the integration access token provided by Xero.
- Company Name displays the corresponding company name on Xero.
- Tracking Category 1, 2 defines the job attributes from Workbench that should be populated into the respective Tracking Categories that can be used for transaction analysis in Xero, refer Tracking Categories.
- Payroll Access indicates whether Xero Payroll is in use and so payroll data should be included in the sync. For details refer Xero Payroll.
The following checkboxes indicate the optional data to sync for the selected financial company:
- Companies - Xero companies require an Account Number to be imported into Workbench, and it is matched to the AP Account or AR Account fields in the Workbench company record.
- Job Receipts - Only Xero AR Payments with an AUTHORISED Status will be synced.
- Payments - Only Xero AP Payments with an AUTHORISED Status will be synced.
- GL Accounts - Indicates that GL Accounts should be synced. This enables the GL Account picker on the Activity details popup, rather than relying on plain text entry.
- Include AP Attachments - Indicates that AP Invoice / Credit Attachments should sync to Xero Attachments.
- Include AR Attachments - Indicates that Job Sales Invoice / Credit Attachments should sync to Xero Attachments.
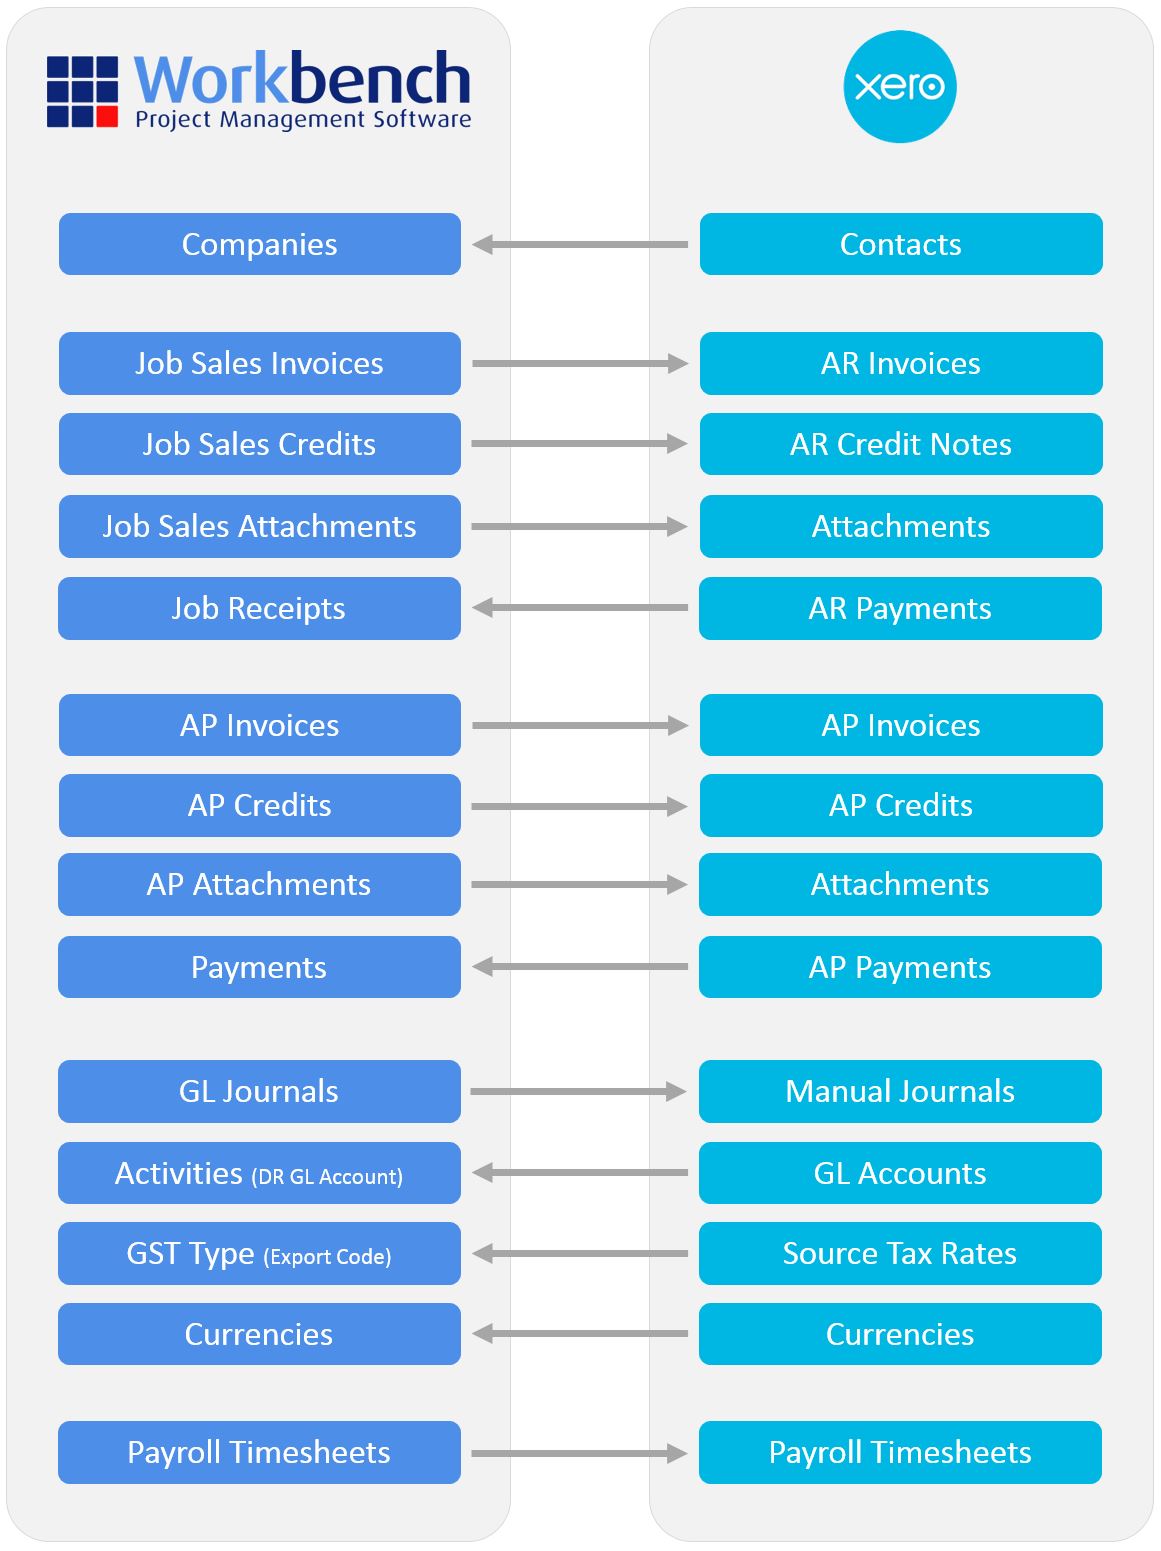
The following data are always synced:
- Job Sales Invoices - These are synced to Xero AR Invoices with status ‘AUTHORISED’.
- Job Sales Credits - These are synced to Xero AR Credit Notes with status ‘AUTHORISED’.
- AP Invoices - These are synced to Xero AP Invoices with status ‘AUTHORISED’.
- AP Credits - These are synced to Xero AP Credits with status ‘AUTHORISED’.
- GL Journals - These are synced to Xero Manual Journals with status ‘POSTED’.
- Source Tax Rates - These are synced from Xero Source Tax Rates and selected with Export Code picker on GST Types list, refer Tax Types.
- Currencies - These are synced to the Currencies list.
Function Buttons

- Connect to Xero - Starts the authentication process for the connection between Workbench and Xero.
- Test - Use this to test the connectivity between Workbench and Xero.
- Validate Companies - This is deprecated functionality.
- Validate Accounts - Verifies that GL accounts used in Workbench exist in Xero, and list those account not in Xero.
- Import - Starts the import process for Companies, Job Receipts, Payments, GL Accounts, Export Codes, and Currencies. The details of the process are displayed below the buttons.
- Save - Saves the Xero integration configuration to Workbench.
Next Steps:
Once configuration is complete, data export from Workbench to Xero is initiated for the respective batch types from Batch Control.
FAQs:
Process Flow: